Showing posts with label Blender Tutorials. Show all posts

Tuesday, April 22, 2014

Blender Tip Smooth Operator

If you want, start humming along with Smooth Operator since apparently setting something to music helps you remember stuff.

Here is a very nice time saving Blender trick I decided to share as a mini one image tutorial. I use the Smooth operator on the Specials menu quite a bit to average out the size of my polys before sculpting, but it was also the perfect trick here to avoid sculpting.  


This shows my somewhat patchy patching job after joining the top and bottom half of a body on an imported obj. I am also working on only half the body to save time, then planning to apply a mirror modifier. I could head into sculpt mode to smooth this out with a brush, but my intended use of a mirror mod means this is not quite as straightforward as it sounds. I would need to apply the mirror mod first, then divide the mesh again if I had further work planned. I could also slowly, using proportional edit maybe, move the verts around until this area made a nice smooth transition. puhleeze.

Instead, use C for circle select to quickly grab some faces (smooth works on edges and verts too, but I find Face Selection mode makes it easiest to see what I'm doing on this). Then press W to bring up Blender's Specials menu, choose Smooth. Now the super timer saver step is press the F6 key to get the Last Operator pop up where you can control the amount of smoothing (number of times that smooth is applied) using the slider. Bonus, in 2.7 you can also choose which axis to apply smoothing to.

Blender gets better and faster all the time.   

Wednesday, September 11, 2013

How to Combine Ambient Occlusion & Texture in Blender 2.6

Okies, so at first I didn't even plan to do baking an AO in the Blender 12 Steps Chair Class, but since everyone is doing sooo much better than I thought we would, I have been revising as I go along.

First I added an Ambient Occlusion bake to the end of Part 7, even though my own personal demo chair never got one, and has to live with the shame of the world's craziest ever UV map lol.

I guess I might have known that after the AO Bake, people would want to know how to combine the shading texture (AO) with the woodgrain texture into a final diffuse map (aka "texture" in SL). I always do this in Photoshop and in general I think you can get more options and better results using a graphics program to finalize your textures. But this can also be done in Blender with not too many extra steps after the Ambient Occlusion bake.

So I made is a video showing how you can do this in Blender and save the final image as the texture (aka "diffuse map" everywhere outside of SL).
Here you go.
  

Tuesday, September 3, 2013

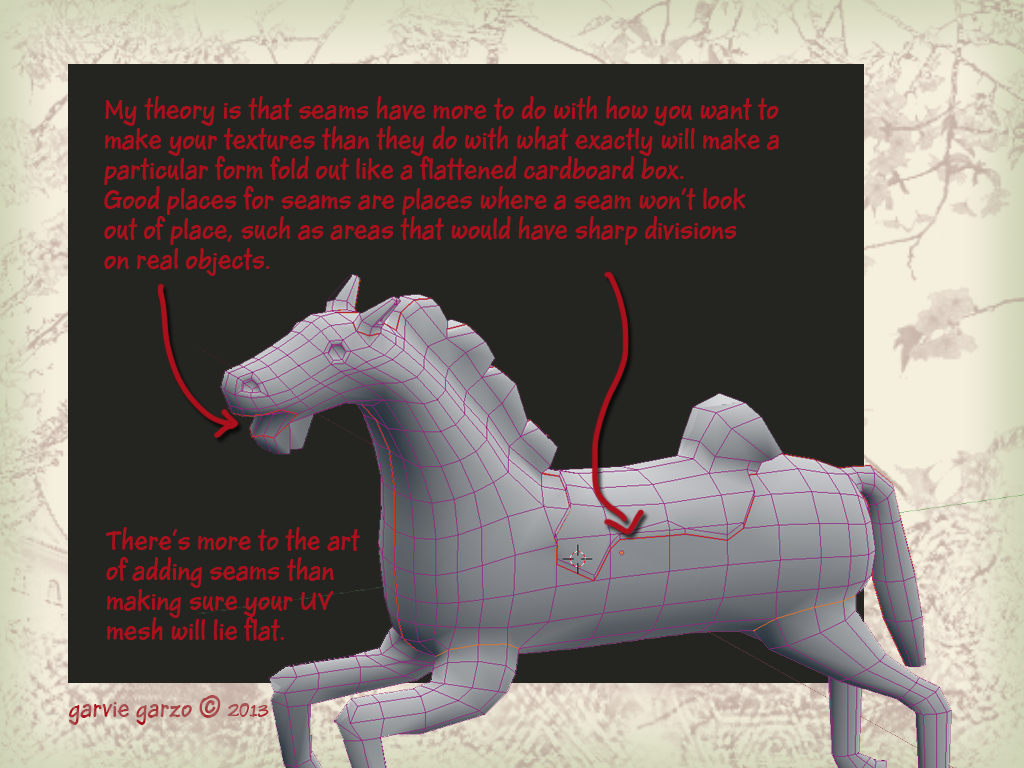
Zen & The Art Of Seams in Blender

So this week I launched into Part 6 of the Box Modeling A Chair saga by introducing everyone to seaming a model in preparation for unwrapping. It was a crappy introduction. I should have said more to get the conversation started, explain that each side has a common goal or something. Anyway, here is a very brief guide to all the things I should have said just to get the party started. 

Texturing is important. And a UV map is a requirement, not an option. You don't absolutely have to make your own UV map from the ground up by manually adding all the seams. But the more control you take at the UV mapping stage, the more control you will have over your final texture. Besides that, the more you understand about the relation between your model, its seams and its texture, the more you will understand about making mesh objects. 

So let me briefly introduce you to seams in Blender, I think it might be the start of a beautiful friendship.


Wednesday, August 28, 2013

Drag & Drop in Blender

So yesterday, I ran across this great looking theme (he calls it a Format) for Blender on Sensei Blender on You Tube. One aspect in particular just struck me as so brilliant I simply could not believe I hadn't seen it done before - by anyone! I wish I had thought of it. Best I can do now is just share it.

You know that animation timeline window down at the bottom of your screen? Handy if animating or running simulations, but otherwise, kinda wasted real estate, so I usually keep mine squeezed shut. But a better idea (borrowed from the Sensei Format) is to turn that window into a File Browser. It's easy, it's fast, and it means you can DRAG & DROP textures and models into the 3D Viewport or UV Image Editor.

I already don't know how I lived without it.


Tuesday, August 27, 2013

How To Bake An AO in Blender

By request, and frequently asked in Blender groups & Builders Brewery, here is a very basic How to Bake an Ambient Occlusion Map in Blender, (starring the chair of course). If you need info on how to unwrap and where to put seams and stuff, either go look that up first, or just use Smart UV Project as your unwrap method for the first one :)


Using a Pen Tablet With Blender

It might be a bit hard to make out those settings, but they are the same I recommended pen or not: Emulate 3 Button Mouse, Continuous Grab & Emulate NumPad. You can find them in User Preferences under the Input Tab.